3D CAD Tutorial: Building Block
3D CAD Tutorial: Building Block
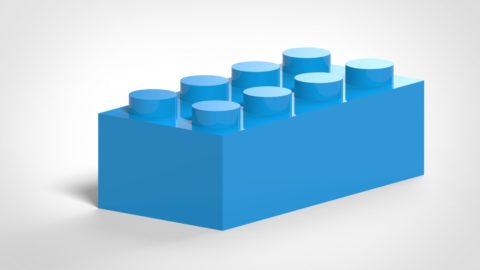
This 3D CAD tutorial guides users to create a model of a toy building block (the ones that really hurt when you step on them without shoes). This folder includes detailed instructions, a step-by-step video, and part files. This 3D model can be saved as a .STL file that can then be 3D printed.

Level:
Elementary School, Middle School
Difficulty:
Intermediate
Select the following link to install the free Siemens Solid Edge 3D CAD software for your classroom (www.siemens.com/plm/solid-edge-highschool). Students can download and install their own free copy of Siemens Solid Edge. (www.siemens.com/plm/solid-edge-student).
Download the text guide with annotated pictures or follow along with the video below.
- Start by creating a NEW part file using a Metric Part template
- Draw a Ø 5 mm circle on the Top plane (x,y plane) with its center located 4mm x 4mm from the origin point of the base coordinate system.
- Extrude the region 4.0 mm to create a cylinder
- Modify the diameter to 4.5 mm and the height to 2.0 mm
- Select the cylinder in the graphics window or from the Pathfinder and select pattern to create a Rectangular Pattern
- Select the fixed option
- Select the 2×4 count
- Distance should be 8.00 mm in both directions
- Redefine the origin for the pattern to keep centered on the base coordinate system by using the Rectangular- Reference Point Command
- From the top view, sketch a rectangle by center and make tangent to the outside edge of the cylinders
- Click to place
- Manually create a tangent relationship to the top silhouette point of the initial cylinders
- Offset that rectangle 1.5 mm to the outside
- Use the extrude command > chain option to extrude the rectangle downward 10 mm
- Delete the sketch
- Add 0.25 mm rounds
- Use All Rounds selection option to pick the part to select outside edges
- Before accepting the selection, change to Face selection and deselect the bottom face
- Accept the selection
- Create a thin wall feature of 1.5 mm and open the bottom face of the brick
- Sketch a circle on the center of the inside of the brick that will just fit between the bumps.
- Offset the circle 0.75 mm
- This will have a thinner wall section to avoid sink marks on the outside of the brick
during molding.
- This will have a thinner wall section to avoid sink marks on the outside of the brick
- Extrude the ring region between the circles to the same height of the brick.
- Select the last protrusion and create a FILL Pattern
- 8.00 x 8.00 mm to add one on either side
- Sketch a Text profile on top of one of the bumps
- F3 to lock to the face
- “EDGE” in Comic Sans font that is 1.00 mm tall
- Use the center option for the anchor point from the Quick Bar
- Place out in space
- Select the text sketch from the Pathfinder to get the steering wheel on the
center anchor point.- Pressing the SHIFT key, select the plane in the center of the
steering wheel twice to flip it in the plane of the sketch - Select the plane and drag the sketch to the center of a bump
- Pressing the SHIFT key, select the plane in the center of the
- Use Extrude > Chain selection to extrude the text .10 mm upward
- Edit the initial pattern
- Add the last text protrusion to the select set
- Select the matching instance for the parent location for the text
- Assign ABS plastic to the part
- Save as 2×4 BRICK.
Congratulations! This concludes the exercise.
Don’t stop here!
Improve 3D Spatial Thinking and Creativity with more examples on the GearupU website. Developed by a Utah State design and engineering teacher focusing on STEM to STEAM, GearupU exposes students to a world of amazing patterns, shapes and artistic designs and gets them excited about STEM. Students with no background in 2D or 3D design should start with Class 1.
Solid Edge for Students
With Solid Edge, students have access to a free version of the same easy-to-use software suite used by professionals. In addition to free software, we provide tutorials, webinars, online courses and certification to help you develop your design and engineering skills.
Training that fits your needs
Get free access to topic-based or project-based tutorials, online self-paced courses and interactive learning resources. Training materials can be used to learn Solid Edge on your own, or to supplement classroom learning. Students can also achieve Solid Edge Certification for a competitive edge when applying to jobs.
A vibrant online and offline community
Access our online Solid Edge User Community, including a dedicated forum for students. Learning Solid Edge also gives you the opportunity to participate in a variety of projects and competitions, including the Greenpower Challenge and Siemens Digital Industries Software Student Design Contest.
We also offer a University Edition that includes more capability for a site-wide implementation. Instructors should visit Solid Edge Resources for Educators for details.
Learners of all ages can gain valuable experience with industry-leading technology, supporting your studies in STEM subjects at all levels of education, from elementary school through university.
How would you rate this content?[thumbs-rating-buttons]
